


 English
  中文简体
中文简体  Español
  Deutsch
 BJX-S003 800W replaceable 2-slice sandwich GrillerThe BJX-S003 800W replaceable 2-slice sandwich Griller offers practical multi-function cooking with four detachable non-stick plates: sandwich, grill,...
See DetailsFor busy office workers and parents, the home sandwich maker is no longer just a simple heating tool, but a key device to tackle the "morning time battle" for breakfast. However, with a wide range of products on the market, what parameters should be used as the selection criteria?
Heating efficiency is the primary criterion for distinguishing good sandwich makers, directly determining the speed of food preparation and the level of taste. Double-sided heating is a basic configuration in the industry, but its "heating uniformity" is easily overlooked. High-quality models have heating tubes evenly distributed on both the upper and lower sides of the baking tray, and can achieve "constant temperature control", avoiding the problem of burnt edges and undercooked centers caused by local overheating. Some low-end models, although labeled "double-sided heating", actually have a large temperature difference between the upper and lower trays, which may result in "burnt upper tray and underheated lower tray". When purchasing, you can check whether the product is marked with details such as "temperature fluctuation range ≤ ±5℃".
Power selection should be based on the number of family members and usage scenarios. For single-person or two-person households, a 1000-1100W model is sufficient to meet needs, as it can complete a sandwich in 3-5 minutes with low power consumption, suitable for daily frequent use. For households with three or more people, it is recommended to choose a high-power model of 1200-1500W, which not only shortens the heating time but also meets the demand for "making two sandwiches at the same time". For example, a double-slot baking tray with a partition design can toast two slices of bread at the same time, avoiding family members waiting in line. In addition, some models are equipped with a "quick preheating" function, which can reach the preset temperature within 30 seconds after being powered on, especially friendly to users in a hurry.
The material of the baking tray is directly related to cooking safety and cleaning difficulty. Currently, the mainstream materials are divided into three categories: aluminum alloy baking trays, ceramic-coated baking trays, and medical stone-coated baking trays. Aluminum alloy baking trays have fast heat conduction and low cost, but need to be used with food-grade non-stick coatings. When purchasing, you need to confirm whether the coating has passed "FDA food contact safety certification" or "LFGB German food-grade certification" to avoid releasing harmful substances at high temperatures. Ceramic coatings have stronger stability, can withstand high temperatures above 250℃, and have better non-stick effects than ordinary coatings, suitable for users who often make greasy food. Medical stone coatings focus on "natural health", contain trace elements, and have higher hardness, which is not easy to be scratched, suitable for families with the elderly and children.
The diversity of functions directly determines the frequency of use and cost-effectiveness of the sandwich maker. If it is only used to make sandwiches, a basic model can meet the needs. However, for users pursuing "multi-purpose in one machine", it is necessary to focus on replaceable baking trays and extended functions. The types of replaceable baking trays usually include sandwich trays, waffle trays, flat baking trays, small frying pan trays, egg waffle trays, etc. Different baking trays correspond to different food scenarios: sandwich trays are suitable for making classic stuffed sandwiches, and the edges can be automatically sealed to prevent fillings from overflowing. Waffle trays should have a "deep groove" design, which allows the batter to fully expand to form a crispy outer and soft inner texture. Flat baking trays have the widest range of uses, and can fry eggs, roast meat, heat rice balls, and even make thin pancakes. Small frying pan trays are suitable for frying a small amount of ingredients, such as bacon and sausages, to avoid oil splashing.
Some high-end models also have "zonal temperature control" and "timing functions" to further improve operational convenience. The zonal temperature control design allows the upper and lower trays or left and right areas to set temperatures separately. For example, the upper tray can toast bread and the lower tray can fry eggs, without worrying about uneven heating of ingredients. The timing function can avoid the problem of "food burning due to forgetting to turn off the heat". Some models are also equipped with a "buzzer prompt", suitable for cooking novices or when multitasking. In addition, the 180-degree opening design is also an important bonus. When opened, it can form "double flat trays" to handle two kinds of ingredients at the same time, such as toasting bread on one side and frying steak on the other, greatly improving the production efficiency.
Safety performance and storage convenience do not directly affect the cooking effect, but are related to the long-term use experience. In terms of safety, it is necessary to focus on the "anti-scald design", "overheat protection" and "automatic power-off" functions. The anti-scald handle should be made of "heat-insulating material" and have an "anti-slip design" to avoid slipping or scalding when holding. The overheat protection function can automatically cut off the power when the machine temperature exceeds the safe threshold to prevent circuit damage. The automatic power-off function is suitable for forgetful users. Some models will automatically power off when the lid is not closed or not used for a long time, reducing safety hazards.
Storage convenience is aimed at users with small apartments or limited kitchen space. Models with a "wire winding post" design at the bottom can wind the power cord for storage to avoid messy cables. The "vertical storage" design allows the machine to be placed vertically, saving horizontal space, such as placing it on the side of a cabinet or in a gap. Some models also adopt an "ultra-thin body" design, with a thickness of only 5-8cm, which does not take up too much space during storage. In addition, if the body material is made of "easy-to-clean plastic", the surface is not easy to be stained with oil, and can be kept clean with daily wiping, reducing the cleaning burden.
The potential of the home sandwich maker goes far beyond making classic ham and cheese sandwiches. As long as you master the skills of ingredient matching and temperature control methods, you can unlock various scenarios such as breakfast, afternoon tea, and light meals, allowing small appliances to play a big role. Different ingredients have different characteristics and adaptability to the baking tray, which need to be adjusted according to the heating time and temperature to achieve the best taste.
Breakfast pursues "speed, nutrition, and variety", and the sandwich maker can just meet these needs. With no complicated operations, you can match a balanced combination of staple foods, protein, and vegetables.
Frozen Food Transformation: For users who often stock up on frozen food, the sandwich maker can become a "frozen food upgrade artifact". Frozen buns and steamed buns do not need to be thawed, and can be directly put into the unheated sandwich maker without closing the lid tightly (to avoid extrusion deformation). After the machine automatically trips for the first time (about 3-4 minutes), flip them and heat for another 2-3 minutes, you can get "roasted buns/steamed buns" with crispy outer skin and soft inner texture. This is faster than heating with a steamer, and adds a layer of burnt flavor. Frozen hand-pulled cakes can be put into a flat baking tray without oiling. Heat for 2 minutes, then flip. When the cake skin layers, crack an egg, sprinkle with green onions, then add lettuce and ham, roll it up to make a "quick hand-pulled cake roll". It uses less oil than frying in a pan and is not easy to burn.
Toast Creative Transformation: Toast is a common breakfast ingredient, and with the sandwich maker, it can be transformed into a variety of eating methods. "Toast Pizza" only needs to use toast slices as the base, spread a layer of pasta sauce, add chopped cherry tomatoes, onion cubes, and sausage slices, and finally sprinkle with cheese shavings. Put it into the sandwich maker (without closing the lid tightly) and heat for 3-4 minutes until the cheese melts. The taste is crispy, and it is faster than making it in an oven. "Banana Toast Roll" requires cutting off the edges of the toast slices, rolling them thin with a rolling pin, adding banana slices, rolling them up, fixing them with toothpicks, putting them into a flat baking tray, brushing a layer of butter, and heating for 2-3 minutes until the surface is golden. It is crispy on the outside and soft on the inside, suitable for users who like sweet food. "Egg Toast Cup" requires putting the toast slice into the groove of the sandwich maker, pressing a depression with a small bowl, cracking an egg, sprinkling with salt and black pepper, putting it into the machine and heating for 5 minutes. After the egg is fully cooked, it can be taken out and matched with vegetable cubes, which is nutritious and filling.
Grain and Leftover Rice Utilization: For families with leftover rice or grains, the sandwich maker can realize "food reuse". "Leftover Rice Pancake" mixes leftover rice with egg liquid, flour, green onions, and a little salt, stirs it into a paste, pours it into a flat baking tray, spreads it flat with a spoon, and heats it for 3-4 minutes until both sides are golden. It can be made into a crispy leftover rice pancake, which is easier to digest than fried rice and has a rich taste. "Multigrain Sandwich" requires pressing cooked multigrain rice (such as brown rice, quinoa, oats) into a cake shape, putting it into a flat baking tray and heating for 2 minutes until the surface is slightly burnt. Then match it with fried eggs, lettuce, and chicken breast, and put it into toast to make a "multigrain sandwich", which increases dietary fiber intake, suitable for fitness or sugar-controlled people.
The service life of the home sandwich maker is directly related to daily cleaning and maintenance. The correct cleaning method can avoid coating damage and circuit failure, and extend the service life of the machine. The wrong cleaning method may cause the baking tray coating to fall off and the body to get damp, affecting the use safety and cooking effect. Different parts have different cleaning methods and need to be handled separately, while paying attention to daily maintenance details.
Before cleaning, the "power-off and cooling" principle must be followed, which is the primary step to ensure safety. The temperature of the sandwich maker is relatively high just after use, and the surface temperature of the baking tray can reach 180-220℃. If cleaning is done directly, it is easy to cause scalding. At the same time, wiping the body with water when it is hot may cause the circuit to be short-circuited due to moisture. The correct method is: after use, turn off the power, unplug the plug, let the machine cool down naturally to room temperature (about 15-20 minutes), and start cleaning only when the outer shell of the machine is not hot to the touch.
The choice of cleaning tools is also crucial, and tools that damage the coating should be avoided. It is recommended to prepare: a soft sponge (or rag), neutral detergent (such as tableware detergent), a dry cloth (or kitchen paper), a toothpick (or cotton swab), and a soft brush (such as an old toothbrush). Avoid using steel wool, abrasive cleaners (such as detergent powder), hard plastic scrapers and other tools. These tools will scratch the non-stick coating of the baking tray, causing ingredients to stick during subsequent use, and the falling coating may be mixed into food, affecting health.
The baking tray is the core part of cleaning, and different stain types require different cleaning methods:
The cleaning of the body shell is relatively simple, mainly to remove oil stains and dust on the surface. You can wipe the surface of the body with a damp rag (wring out the water to avoid dripping). If there is oil stain, you can dip a small amount of detergent and gently wipe it, then dry it with a dry cloth. It is necessary to pay special attention: the power interface, heat dissipation holes and other parts of the body cannot be rinsed with water or directly wiped with a damp rag to prevent water from entering the circuit and causing a short circuit. If there is dust in the heat dissipation holes, it can be gently swept away with a soft brush to avoid dust accumulation affecting the heat dissipation of the machine and causing overheating failure.
The power cord and plug are easily overlooked cleaning parts, but long-term non-cleaning may lead to dust accumulation and insulation layer aging. During cleaning, you can wipe the surface of the power cord with a dry cloth to remove dust. For the plug part, you must first confirm that it is completely powered off, then wipe the metal pins with a dry cloth to remove the oxide layer or dust to avoid poor contact. It should be noted that the power cord should not be pulled or folded hard to avoid breaking the internal copper wire. During storage, the power cord should be wound neatly to avoid knotting or squeezing, which may damage the insulation layer.
During long-term use, the sandwich maker may experience common malfunctions such as failure to start, uneven heating, and food sticking. Most of these malfunctions are not caused by machine damage, but by improper operation or inadequate daily maintenance, which can be solved through simple inspection and adjustment. Mastering basic fault diagnosis methods can avoid unnecessary maintenance costs and quickly restore the machine to use.
The machine has no response after being powered on, or suddenly powers off during use. This is the most common type of malfunction. Priority should be given to checking the power supply and safety devices.
First, check the "power connection": Confirm that the plug is fully inserted into the socket and that the socket is powered on (you can insert other electrical appliances such as mobile phone chargers to test). If the socket has no power, check whether the household circuit switch has tripped. If the plug and socket have poor contact, you can try replacing the socket or adjusting the position of the plug to ensure that the metal pins are fully in contact. The power cord of some models is connected to the body with a "detachable design". It is necessary to check whether the connection part is plugged in tightly. If it is loose, re-plug it to ensure good contact.
If the power connection is normal, then check the "safety device triggering": The overheat protection and automatic power-off safety functions of the sandwich maker will trigger a shutdown if an abnormality is detected. The overheat protection is usually triggered because the machine has been used continuously for too long (such as more than 30 minutes) or the heat dissipation holes are blocked, resulting in excessive temperature. At this time, you need to turn off the power, unplug the plug, let the machine cool down for more than 30 minutes, clean the dust in the heat dissipation holes, and then try to start it again. The automatic power-off function may be triggered because the lid is not fully closed. Some models will trigger the safety switch if the lid buckle is not fastened, causing the machine to fail to start. You need to check whether the lid is aligned with the buckle and press it hard until a "click" sound is heard to ensure it is fully closed. In addition, some models are equipped with a tilt protection (a few high-end models), which will trigger if the machine is tilted or placed unevenly. You need to place the machine on a horizontal and stable tabletop and then try to start it.
If the machine still cannot start after the above checks, there may be an internal circuit fault (such as a damaged heating tube or a faulty thermostat). At this time, do not disassemble the machine by yourself. Contact the brand after-sales service or professional maintenance personnel for testing to avoid electric shock risks.
The problem of "local burning and local undercooking" during food preparation is caused by factors such as ingredient status, baking tray conditions, and operation methods. Most cases can be improved through simple adjustments.
Ingredient Factors: Differences in the thickness and moisture of ingredients can lead to uneven heating. If the sandwich contains thick ingredients (such as thick-sliced ham or large pieces of cheese), place the thick ingredients in the middle to avoid being near the edge of the baking tray. The edge temperature is usually higher, which easily causes the ingredients to burn. If the ingredients are too moist (such as fresh lettuce or just-washed tomato slices), use kitchen paper to absorb the surface moisture before putting them into the machine. Moist ingredients will absorb heat, leading to insufficient heating of the surrounding bread and a soft texture. In addition, the ingredients placed on the baking tray should be evenly arranged to avoid too many ingredients on one side and too few on the other. This will cause a weight difference on both sides, making the baking tray unevenly stressed and affecting heating contact. Ensure the ingredients are arranged symmetrically with the same thickness.
Baking Tray Issues: The cleaning status and installation of the baking tray also affect heating. If the baking tray coating has a lot of oil stains and food residues, it will affect heat conduction efficiency, leading to slow local heating. Thoroughly clean the baking tray according to the cleaning methods mentioned earlier to remove stubborn stains. For models with replaceable baking trays, if the baking tray is installed incorrectly and not fully attached to the heating area, some areas will have no heating. Reinstall the baking tray to ensure the buckle is fully clamped and the baking tray is aligned with the heating area of the machine body. If the baking tray has been used for a long time and the coating is severely worn, it may cause uneven heat conduction. You can try applying a small amount of cooking oil (thin coating) on the surface of the baking tray to form a heat-conducting layer and improve the heating effect. If the wear is severe, the baking tray needs to be replaced.
Operation Adjustments: Improper setting of heating time and lid pressure can also lead to uneven heating. If the machine supports "temperature adjustment", adjust the corresponding temperature for different ingredients. For example, the temperature can be set to 180-200℃ for toast-based ingredients, and 200-220℃ for meat ingredients. Too high a temperature will easily cause burning, while too low a temperature will result in insufficient heating. The lid pressure should be moderate. If you press the lid hard, the ingredients will be over-squeezed, and the local contact time with the baking tray will be too long, which is easy to burn. Just close the lid gently and use the machine's own weight to maintain pressure. In addition, the heating power of the upper and lower trays of some models is different (such as 1000W for the upper tray and 800W for the lower tray). You can flip the ingredients once during heating to ensure even heating on both sides. For example, when making a sandwich, flip it after heating for 2 minutes and then heat for another 1-2 minutes to avoid over-burning of the ingredients on the lower tray.
Food sticking to the baking tray not only affects the taste but also increases the difficulty of cleaning. The main reasons are damage to the baking tray coating or insufficient anti-sticking treatment during operation. This can be improved by protecting the coating and adjusting the operation.
First, check the "baking tray coating status": If the coating is scratched or peeled off, the ingredients will easily stick to the metal base. Stop using this baking tray, or apply a thin layer of cooking oil (apply evenly with a brush, avoid excessive) before use. The cooking oil can form a temporary anti-sticking layer to reduce sticking. If the coating is intact, sticking may be caused by "no preheating" or "too wet ingredients". When the machine is not preheated, the temperature of the baking tray is low, and the ingredients will easily adhere after contact. Ensure the machine is fully preheated (most models have an indicator light prompt, such as a green light on) before putting in the ingredients. If the ingredients contain a lot of moisture (such as egg liquid or batter), add a small amount of flour to the ingredients or use kitchen paper to absorb the surface moisture to avoid sticking caused by the contact between moisture and the low-temperature baking tray.
Adjusting operation details can also reduce sticking: When putting in ingredients, avoid touching the baking tray with metal tools. Use a silicone spatula or chopsticks to place them gently to prevent scratching the coating. When making batter-based ingredients (such as waffles and egg waffles), ensure the batter evenly covers the grooves of the baking tray to avoid local thinness. Too thin batter is easy to stick to the baking tray and difficult to peel off. The heating time should be sufficient. When the ingredients are not fully cooked, the internal moisture is not evaporated, and they are easy to stick to the baking tray. Wait for the machine to automatically trip or reach the preset time before trying to take out the ingredients. If you are worried about burning, you can check 1 minute in advance. If the edge of the ingredients has separated from the baking tray, it means it is fully cooked and can be taken out safely.
If after trying the above methods, the ingredients still stick severely, the baking tray coating may be completely damaged. Replace it with a new baking tray, and choose an original baking tray that matches the machine model to ensure heating effect and safety. Avoid using non-original baking trays, which may cause uneven heating or machine failure.
The home sandwich maker not only meets the needs of the general population but also requires targeted adjustments in ingredient selection and preparation methods for special groups such as the elderly, children, and sugar-controlled individuals. It balances nutrition, taste, and health needs to ensure safe and reliable use for all groups.
The elderly have weaker chewing and digestive functions. When preparing food, emphasis should be placed on "softness, low irritation, and balanced nutrition". Hard, tough, or greasy ingredients should be avoided, and operation steps should be simplified to facilitate independent use by the elderly.
In terms of ingredient selection, prioritize "low-gluten, high-moisture" staple foods such as soft toast, steamed bread slices, and fluffy pancakes. Avoid hard-textured ingredients like whole-wheat toast and multigrain bread. For protein, choose tender ingredients such as steamed fish, minced chicken breast, and tofu. Chop them and stuff into staple foods, or shape into meatballs or patties and heat on a flat baking tray to ensure the meat is tender. Vegetables should be processed into "easy-to-chew" forms: slice carrots thinly and blanch, chop spinach, and remove tomato seeds to avoid chewing difficulties caused by excessive crude fiber.
In preparation methods, "extending heating time and lowering heating temperature" can make ingredients softer. For example, when making a chicken sandwich, mix minced chicken breast with a little starch and water to form a thin patty. Place it on a flat baking tray and heat at a low temperature (160-180℃) for 5-6 minutes, flipping 2-3 times during the process to ensure the meat is fully cooked without being dry. When heating steamed bread slices, spray a little water on the surface before putting them into the sandwich maker to prevent them from becoming too dry and hard after heating. In terms of operation, choose a "one-button" model to reduce temperature and time adjustment steps. The elderly only need to put in ingredients and close the lid, lowering the difficulty of use. Additionally, post a large-font operation guide next to the machine, marking key steps such as "power on - put in ingredients - wait for automatic power-off" to facilitate the elderly's memory.
Children generally have the problem of picky eating. "Fun shapes and hidden nutrition" can be used to encourage children to actively accept nutritious ingredients. At the same time, ensure ingredients are safe, boneless, and thornless to avoid choking risks.
In terms of shape transformation, use the grooves of the sandwich maker or matching molds to make cartoon-shaped food. For example, use a circular mold to press toast slices into circles, stuff with strawberry jam and banana slices to make "mini cake" shapes. Use a waffle tray to make "mini waffles", match with chocolate sauce and fruit cubes, and arrange into smiling faces or animal shapes. Put rice balls on a flat baking tray, press into star or heart shapes, and decorate with seaweed sheets to increase food fun.
The ingredient hiding technique targets children who dislike vegetables. Chop vegetables and mix them into staple foods or fillings. For example, when making vegetable and egg pancakes, chop spinach, carrots, and shiitake mushrooms, mix with egg liquid and flour, pour into a flat baking tray to make small pancakes. The vegetable particles are wrapped in eggs, making it hard for children to notice. When making chicken sandwiches, blanch broccoli and mash it, then mix with minced chicken breast to make fillings. This not only supplements dietary fiber but also does not affect the taste. For safety, all ingredients must be "deboned, thornless, and cut into small pieces". For example, remove fish bones from fish and cut chicken into small cubes to avoid choking during chewing. Avoid spicy and irritating seasonings such as chili and Sichuan pepper, and use light flavors to protect children's intestines and stomachs.
Sugar-controlled groups need to strictly control carbohydrate and sugar intake. When preparing food, choose "low-GI (Glycemic Index), high-fiber" ingredients, avoid refined sugar and high-starch ingredients, and at the same time ensure protein and dietary fiber intake to slow down blood sugar rise.
For staple foods, select low-GI ingredients such as whole-wheat toast (ensure no added sugar), rye bread, corn tortillas, and buckwheat pancakes to replace ordinary white toast. Avoid sugary frozen foods such as sweet steamed buns and red bean buns; instead, make sugar-free steamed buns and multigrain pancakes at home. For protein, choose low-fat, high-protein ingredients such as eggs, sugar-free yogurt, chicken breast, shrimp, and tofu to increase satiety and reduce staple food intake. Prioritize green leafy vegetables (such as lettuce, spinach, and Chinese cabbage), mushrooms (such as shiitake mushrooms and enoki mushrooms), and melon and eggplant vegetables (such as cucumbers and tomatoes) for vegetables. These ingredients have low GI values and are rich in dietary fiber, which can increase food volume and slow down sugar absorption.
In preparation methods, "reduce added sugar and control oil" is essential. For example, when making waffles, replace milk with sugar-free yogurt and use sugar substitutes such as erythritol and stevioside instead of white sugar to reduce sugar intake. When making sandwiches, avoid sugary sauces such as salad dressing and tomato sauce; instead, use seasonings such as black pepper, salt, vinegar, and olive oil. No additional oil is needed when heating ingredients; use the ingredients' own oil (such as bacon and sausage) to reduce oil intake. In addition, control the amount of staple food: each preparation should not exceed 100g of staple food (about 1 slice of whole-wheat toast or 1 small corn tortilla), and match with sufficient vegetables (about 200g) and protein (about 50g) to form a "low-carb, high-fiber, high-protein" nutritional combination, helping to stabilize blood sugar.
The use of a home sandwich maker can be adjusted according to the season. Combine the characteristics of seasonal ingredients and climate needs to create seasonal delicacies, and optimize usage methods to adapt to the usage scenarios of different seasons.
The climate warms up in spring, and people tend to experience "spring tiredness" and "poor appetite". It is necessary to choose "light, refreshing, and vitamin-rich" ingredients, use fresh spring vegetables to make appetizing and greasy-free delicacies, and avoid excessive oil intake.
Recommended seasonal recipes include "Bamboo Shoot and Egg Sandwich": Peel bamboo shoots, slice them thinly, blanch to remove astringency, and season with a little salt and light soy sauce. Crack an egg into a flat baking tray and fry into a runny yolk egg. Spread a little sugar-free peanut butter on whole-wheat toast slices, then layer with bamboo shoot slices, runny yolk egg, and lettuce. Put into the sandwich maker and heat for 3 minutes to make a bamboo shoot and egg sandwich. The crispness of bamboo shoots matches the creaminess of the runny yolk, with a refreshing taste and rich dietary fiber. "Chinese Toon and Egg Pancake" is also a spring specialty: chop Chinese toon buds, mix with egg liquid and a small amount of low-gluten flour, add a little salt for seasoning, pour into a flat baking tray, and heat for 4 minutes until golden on both sides. The unique aroma of Chinese toon can stimulate appetite, making it suitable for spring consumption.
In terms of usage tips, the air humidity is relatively high in spring, and the machine may be slightly damp after storage. Before the first use, power on and preheat for 5 minutes to evaporate the moisture inside the machine and avoid short circuits. After washing, ingredients must be thoroughly dried, especially fresh spring vegetables (such as bamboo shoots and Chinese toon), which have high water content. If heated directly without drying, the food is prone to becoming soft and mushy, affecting the taste.
The climate is hot in summer, and people prefer "cold food and light meals". The sandwich maker can be matched with refrigerated ingredients to make cold sandwiches that do not require high-temperature heating, or use a flat baking tray to make low-fat light meals, avoiding excessive heat generation during cooking while supplementing moisture and vitamins
Recommended cold food recipes include "Avocado and Shrimp Sandwich": Blanch shrimp and refrigerate, slice avocado, spread sugar-free yogurt on whole-wheat toast slices, then layer with avocado slices, refrigerated shrimp, cucumber slices, and lettuce. No need to heat in the sandwich maker; directly make a cold sandwich with a cool taste, rich in high-quality protein and healthy fats. "Vegetable and Chicken Roll" uses a flat baking tray to heat a thin pancake for 1 minute (no need to overheat), then roll in refrigerated shredded chicken breast, lettuce, tomato slices, and purple cabbage shreds, and season with a little lemon juice. It is low-fat and refreshing, suitable for summer lunches.
In terms of usage tips, the room temperature is relatively high in summer. When the machine is heating, ensure the heat dissipation holes are unobstructed. Avoid placing it in direct sunlight or near heat sources (such as refrigerators and ovens) to prevent the machine from overheating. When making cold food, put toast slices and thin pancakes in the refrigerator for 10 minutes, then match with refrigerated ingredients to enhance the cool taste. Clean the machine in a timely manner after use to prevent food residues from spoiling at high temperatures and breeding bacteria.
The climate is cold in autumn and winter, and the human body needs "high-calorie, high-nutrition" food to keep warm. The sandwich maker can make warm and substantial delicacies, matched with root vegetables and meat to supplement energy, and use the machine's heating function to prevent ingredients from cooling down too quickly.
Recommended autumn and winter recipes include "Sweet Potato and Cheese Sandwich": Steam sweet potatoes and mash them, mix with a little milk, spread the sweet potato mash on whole-wheat toast slices, sprinkle with cheese shavings, put into the sandwich maker and heat for 4 minutes. The cheese melts and blends with the sweet potato mash, with a sweet and soft taste, rich in carbohydrates, which can quickly supplement energy. "Beef and Vegetable Baked Pancake" uses a flat baking tray to fry beef slices until cooked, add carrot slices, onion slices, and bell pepper slices, stir-fry, wrap in a thin pancake, and put into the sandwich maker to heat for 2 minutes. This makes the pancake crust crispy and the filling warm, suitable for autumn and winter dinners.
In terms of usage tips, autumn and winter ingredients (such as sweet potatoes, potatoes, and beef) have hard textures and need to be pre-processed: steam sweet potatoes and marinate beef slices to reduce the machine's heating time. Extend the preheating time of the machine by 1-2 minutes to ensure the baking tray temperature is sufficient and avoid underheating of ingredients. After use, leave the machine lid half-open to allow heat to dissipate slowly, preventing water vapor from forming due to excessive temperature difference on the machine body, which may affect the internal circuit.
In addition to daily cleaning and maintenance, long-term use of the sandwich maker also requires attention to details such as "performance maintenance, part replacement, and idle maintenance". This avoids performance degradation of the machine due to long-term use, such as reduced heating efficiency and aging of the baking tray coating. Through scientific maintenance, the machine can maintain good condition and extend its service life.
After long-term use, the machine may experience performance issues such as "inaccurate heating temperature and timing function deviation". Regular calibration and testing are required to ensure normal functionality.
Temperature calibration can be done through the "ingredient testing method": Select standard ingredients (such as toast slices), heat them according to the temperature recommended in the manual (e.g., 180°C), and observe the browning of the toast. If the toast does not brown after 3 minutes of heating, the temperature is too low, which may be due to aging of the heating tube or deviation of the thermostat. Contact maintenance personnel for adjustment. If the toast burns within 1 minute, the temperature is too high; check if the thermostat is faulty to avoid burning food or damaging the machine due to continued use.
Timing function testing requires comparing "actual time and set time": Set a timer for 5 minutes and use a stopwatch to time simultaneously. If the actual power-off time of the machine differs from the set time by more than 1 minute, there is a deviation in the timing function. Check the timer component; if the deviation is too large, replace the timer to avoid affecting cooking results.
In addition, regular "empty preheating" can also maintain machine performance. Perform empty preheating 1-2 times a month: set the machine to the maximum temperature, heat for 5 minutes, then turn off the power and let the baking tray cool naturally. This can remove residual oil stains inside the baking tray and activate the heating tube, avoiding performance degradation of the heating tube due to long-term idleness.
Parts such as the "baking tray, power cord, and sealing ring" of the sandwich maker are vulnerable parts. They will age and be damaged after long-term use and need to be identified and replaced in a timely manner to avoid affecting use safety and effectiveness. The following table summarizes the key points for replacement of common vulnerable parts:
|
Vulnerable Part |
Signs of Need for Replacement |
Replacement Precautions |
Post-Replacement Check |
|
Baking Tray |
1. Large-area coating peeling 2. Deformation of tray body 3. Deep scratches affecting anti-stick effect 4. Local uneven heating |
1. Must choose original tray matching the machine model 2. Power off and cool the machine completely before replacement 3. Gently twist the buckle when removing the old tray to avoid damaging the machine body 4. Ensure the new tray is fully clamped and has no looseness |
1. Preheat empty for 3 minutes to check if the tray heats evenly 2. Test with a small amount of toast to confirm no sticking 3. Check if the tray is aligned with the machine's heating area |
|
Power Cord |
1. Insulation layer cracking or peeling 2. Metal pins of the plug are oxidized, deformed, or loose 3. Abnormal heating of the cord during use4. Intermittent power failure of the machine |
1. Do not replace by yourself; contact brand after-sales or professional electricians 2. Select a cord with matching power (e.g., 10A, 250V) and meeting safety certifications 3. Ensure the new cord's connector matches the machine's interface 4. Avoid using inferior or non-compliant power cords |
1. Plug in and test if the machine starts normally 2. Check if the cord has abnormal heating during 5-minute preheating 3. Confirm the plug is tightly connected and has no looseness |
|
Sealing Ring |
1. Cracks or hardening of the ring body 2. Poor sealing (heat leakage from the lid during heating) 3. The ring falls off easily when opening/closing the lid 4. Abnormal noise when closing the lid |
1. Purchase a sealing ring of the same model as the machine 2. Clean oil stains in the ring groove before replacement 3. Embed the new ring along the groove to ensure it fits tightly 4. Avoid stretching or twisting the ring during installation |
1. Close the lid and check if it fits tightly without gaps 2. Heat empty for 5 minutes to confirm no heat leakage from the lid edge 3. Open/close the lid 3-5 times to check if the ring is stable |
For baking tray replacement, "model matching" is essential: When the baking tray coating falls off on a large scale, becomes deformed, or has too deep scratches, replace it with a new one. Choose an original baking tray that matches the machine model to avoid uneven heating or inability to install due to mismatched sizes of non-original baking trays. Before replacement, power off and cool the machine. When removing the old baking tray, gently twist the buckle to avoid damaging the machine body due to excessive force. Ensure the new baking tray is fully clamped and not loose when installing.
Power cord replacement requires "professional operation": If the power cord is damaged or aged, do not replace it yourself. Contact the brand after-sales service or a professional electrician, and select a power cord that matches the machine's power (e.g., 10A, 250V). Ensure the insulation layer of the power cord meets safety standards to avoid short circuits or electric shock risks caused by using inferior power cords.
After the sealing ring (equipped on some models for sealing the lid) ages, problems such as "poor sealing and heat leakage during heating" will occur. Regularly check if the sealing ring has cracks or deformation. If it is aged, purchase a sealing ring of the same model for replacement. Before replacement, clean the oil stains in the sealing ring groove, then embed the new sealing ring into the groove to ensure good sealing and avoid heat loss during heating.
If the sandwich maker is not used for a long time (e.g., more than 1 month), proper idle maintenance is required to prevent the machine from getting damp and parts from aging, ensuring normal performance when used next time.
Before storage, "thoroughly clean and dry" the machine: Clean the baking tray and machine body thoroughly according to daily cleaning methods to remove all oil stains and food residues. Wipe dry with a dry cloth to ensure no moisture inside the machine. A thin layer of edible oil (such as olive oil) can be applied to the surface of the baking tray to form a protective film and prevent coating oxidation. Cover the machine body with a dust cloth to avoid dust accumulation.
The storage environment should be "dry, ventilated, and away from light": Avoid placing the machine in a humid environment (such as a bathroom or under the sink) or in direct sunlight. A humid environment is prone to causing the machine body to rust and the circuit to get damp, while direct sunlight will accelerate the aging of plastic parts. The machine can be placed in a carton with desiccants (such as silica gel desiccants) to absorb moisture in the air. At the same time, avoid placing it with sharp objects to prevent scratches on the machine body.
During the idle period, "power on regularly": Power on the machine once a month, preheat it empty for 3-5 minutes to heat the internal components and remove moisture, avoiding oxidation or poor contact of the circuit due to long-term idleness. After powering on, check if the machine has abnormal noises or odors. If it is normal, turn off the power and continue storage. If there is an abnormality, troubleshoot in a timely manner to avoid safety hazards when used next time.
The home sandwich maker, often regarded as a "small kitchen appliance", can become a versatile helper in daily cooking with the right selection, use, and maintenance methods. From choosing a model that fits your family's needs to unlocking creative recipes for different seasons, from ensuring safe use for special groups to extending the machine's service life through scientific maintenance, every detail affects the experience of using this appliance.
It is not just a tool for making sandwiches, but a carrier for improving the quality of daily meals—helping busy office workers save breakfast time, making it easier for parents to prepare nutritious meals for children, and providing sugar-controlled groups with healthy and delicious food options. By mastering the knowledge in this guide, you can fully tap the potential of the home sandwich maker, turning simple ingredients into diverse delicacies and making every meal more efficient, healthy, and enjoyable.
Whether you are a novice in the kitchen or an experienced cook, the home sandwich maker can bring convenience and fun to your cooking life. As long as you keep exploring and adjusting according to your actual needs, this small appliance will continue to create surprises for your daily diet.
Your email address will not be published. Required field are marked*

sales@beijiexi.com

BJX-S003 800W replaceable 2-slice sandwich GrillerThe BJX-S003 800W replaceable 2-slice sandwich Griller offers practical multi-function cooking with four detachable non-stick plates: sandwich, grill,...
See Details
The BJX-S002 Single-chip sandwich maker with switch and Removable Plates features six interchangeable plates: sandwich, waffle, donut, cake pop, and fish. Equipped with an ON/OFF switch, it offers sim...
See Details
The BJX-S011 15-Minute Timer Single-Slice Removable Plates Sandwich Maker features six interchangeable plates: sandwich, waffle, donut, cake pop, and fish. Equipped with a 15-minute timer, it ensures ...
See Details
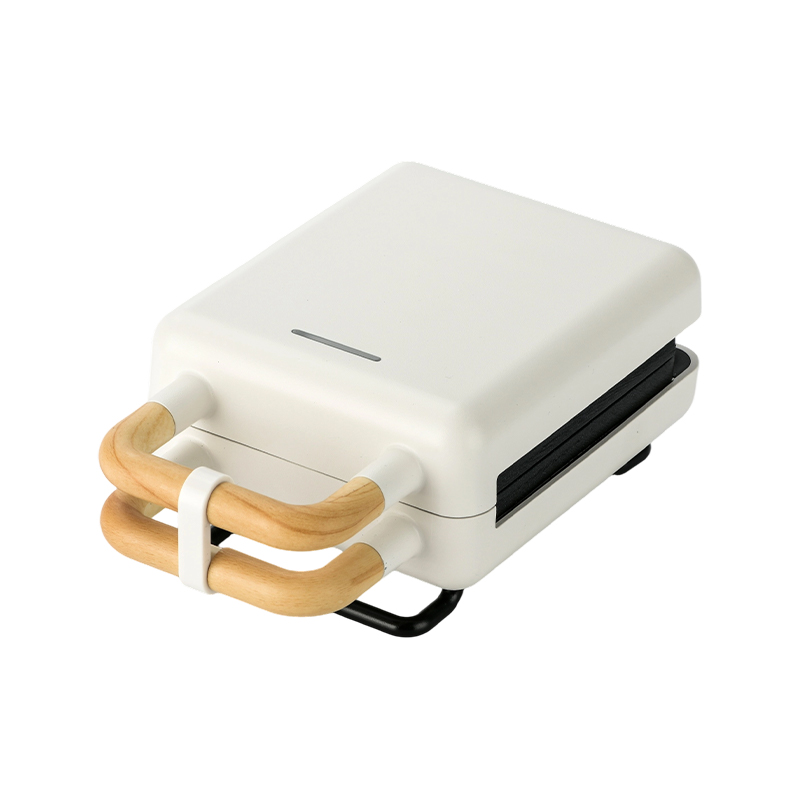
BJX-S015 – Elegant Design Meets Everyday Convenience The BJX-S015 Sandwich Maker with Wood Grain Handle and Fixed Plate is built for those who value style and functionality in their kitchen. Featuring...
See Details
BJX-S016 – One Machine, Multiple Breakfast Creations The BJX-S016 is a versatile 2-slice multi-function maker that combines power, precision, and convenience in one appliance. With its dual heating pl...
See Details
BJX-S025 – From Sandwich Press to Open Grill in Seconds The BJX-S025 is a 2-slice multi-function maker designed for ultimate versatility. Unlike standard models, it can be opened flat to 180°, instant...
See Details
BJX-B001 – Retro Style, Healthy Popcorn Made Easy The BJX-B001 is a hot air popcorn maker with a vintage-inspired design that brings charm and functionality to your kitchen. With a 60g capacity, it ma...
See Details
BJX-B004 – Efficient, Healthy, and Distinctive The BJX-B004 60g Hot Air Popcorn Maker No Oil offers a new level of convenience and style. Its hot air popping technology produces crispy, oil-free popco...
See Details
BJX-B005 – Compact, Efficient, and Healthy The BJX-B005 60g Compact Hot Air Popcorn Maker is perfect for snack lovers with limited kitchen space. Its small footprint and lightweight design make it eas...
See Details
BJX-B006A – Flavorful, Timed, and Convenient The BJX-B006A 100g Timed Flavored Popcorn Machine is perfect for popcorn enthusiasts who love custom flavors. Its 100g capacity and 15-minute timer ensure ...
See Details
BJX-B008 – Vintage Style, Healthy, and Convenient The BJX-B008 80g Retro Hot Air Popcorn Maker brings retro charm and modern convenience together. Its 80g capacity is ideal for quick snacks or small g...
See Details
BJX-C704 – Minimalist Design for Fun at Home The BJX-C704 Home Use Simple Cotton Candy Machine is designed with a simple, modern aesthetic, providing a stylish and compact appliance for home use. Equi...
See Details
Copyright © Ningbo Beijiexi Electrical Appliance Co., Ltd. All Rights
Reserved
China Small Kitchen Appliances Manufacturers Wholesale Small Kitchen Appliances Supplier
![]()